One of my big loves when it comes to being crafty is by far making art with Hama beads. If you’re aware of what Hama beads are, there is a big chance right now you’re imagining cartoon looking cars or other things like that, probably made by little kids. Well, I love using them as part of mixed media projects, especially superhero themed ones.
It’s something I came across on Instagram one day, and once I started I got hooked. If you’re after something therapeutic definitely give it a try, you can find a lot of patterns on this website too which is where I started. After a while though, I wanted to be a little different and make some cooler, different designs of my own.
I’ll talk you through my process (in case you’re after some motivation for making them!).
First up, work out the basic shape you want for your design! A pretty handy tip is that you could get some square paper if you really want to plan ahead. I’ll admit though, I usually just go straight in and work out the outline that way. I’m never that worried at the start about colours either, because I end up messing around until I’m really happy with it… methodical, right?
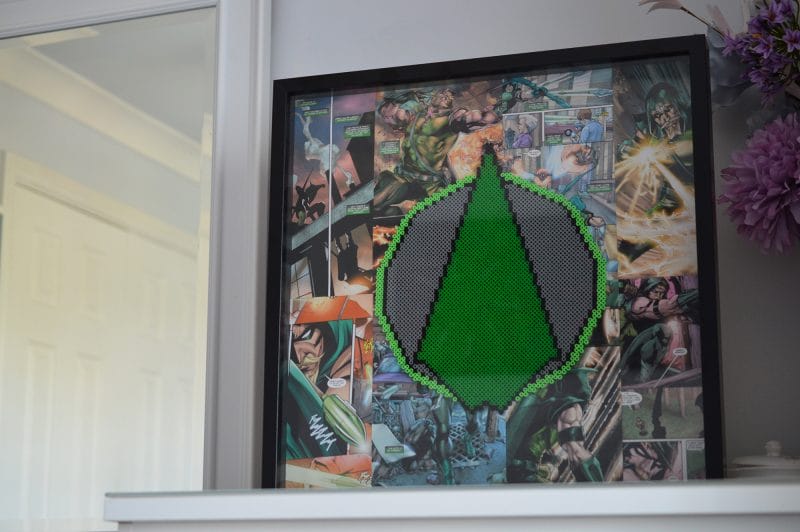
For example, with my Green Arrow project, I knew I wanted a grey background, and then I ran out of grey Hama beads… Because of this, I decided to outline the outside in black. I really liked how 3D this made it though, a little too much, so I thought I’d copy this for the outline of the arrow itself.
The next part is the most nail biting, frustrating part of the whole process. Because you create the design on a board, the idea behind it is you then just iron over the design and board. But, heat bends plastic (which then means uneven ironing)! For best results, grab some thick tape (e.g. masking tape) and tape all over it, pull it off the board as one and then iron it once it’s off the board (and under some ironing paper).
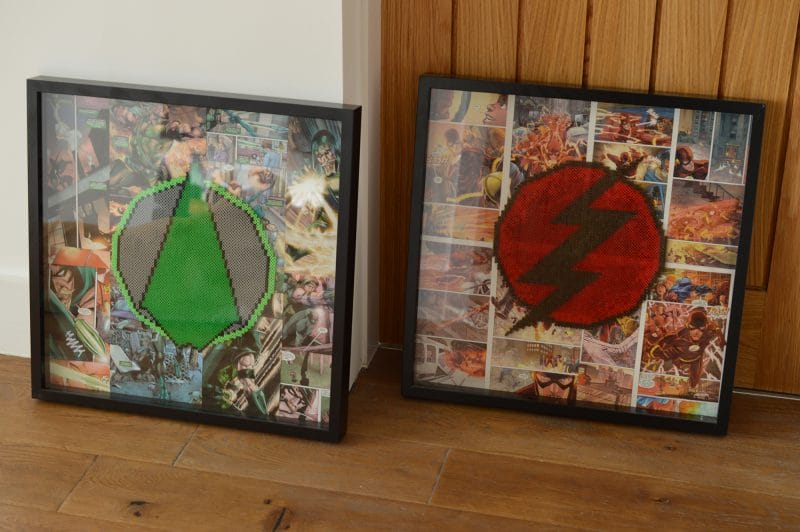
Ironing the beads will then fuse them all together (which is really relaxing to watch too). What I do is iron one side as much as possible, then flip it over and use that side for the project. Next, I figure out what I’m going to do for the background – superhero art = comic book backgrounds! I glue the strips directly to the paper at the back of the frame, then I glue that onto the actual back of the frame, (if you’re after nice, big, frames like this then head to IKEA) and once that’s dry, use a glue gun to make sure the Hama art is securely on it.
So far I’ve done one for The Flash and one for Green Arrow (two DC superhero characters). Got a lot more planned out but unfortunately, as calming as it is, it’s also both time and space consuming! I’m thinking maybe Supergirl will be next up though soon.


Anyway, I hope you like my little projects! If this inspires you to go and create something then drop me a message on one of my social media pages, would love to see what others will come up with!
Update:
I’m now selling Hama bead art on Etsy! Check out my store here if you’re interested.

Follow me on my social media pages to keep up to date with further posts!
500px — Bloglovin’ — Facebook — Instagram — Twitter


Leave a Reply